Update: Article updated on 2018-02-03 with project changes.
Working in Enterprise software, Java / Springboot micro-services for distributed / high availability software is now the standard. Because of how often I come across this I thought I’d take a moment to quickly run through how to deploy your own micro-services on Minishift ( a personal Openshift cluster).
In my spare time I like to play around with questions from Project Euler. So I’ll be using a Springboot project with solutions to a few of the problems available here
For this example (if you want to follow with) you’ll need:
- A working internet connection ;)
- A copy of the oc binary
- Access to this sample project
You can find guides on getting started with the oc binary from Red Hat, personally I’ve found set up to be very straightforward, placing the binary in my ~/.local/bin directory. The only thing to keep in mind is to configure an insecure docker registry in the 172.30.0.0/16 address space.
For example see the following daemon.json:
yousof@laptop:~$ sudo cat /etc/docker/daemon.json
{
    "dns":["8.8.8.8", "8.8.4.4"],
    "insecure-registries":["172.30.0.0/16"]
}
You will need to restart your docker daemon if you apply the above configuration:
systemctl restart docker
Separately I found another issue with Openshift where I was unable to check code out of github within the Openshift environment with search urls in my resolv.conf.
So to be on the safe side you can edit the runtime config and remove any search instructions from your: /etc/resolv.conf, however it’s likely this won’t affect you.
Moving on - start your Openshift cluster:
oc cluster up
and login:
oc login -u developer -p developer
Peronally, I am familiar with Gradle / Springboot and so Red Hat’s Wildfly build image which looks for a maven pom.xml will not be useful for us.
Apart from just being a container orchestration service like Kubernetes, scheduling deployments from a docker registry - Openshift is made for large enterprises and has various features to smooth out deployment pipelines, and allow multiple teams / applications to work on different applications on multi-tenant servers.
The part of their service that involves pipelines also includes a very useful feature called Source-To-Image (S2I) which pulls some source from a git repo, builds it in a builder image, then pushes a new image with the compiled / deployment ready image to the Openshift registry. Webhooks monitor the repo for new commits so that the new source can be compiled / deployed as soon as it’s ready.
The repo described above contains two parts of one project, a front end which uses JBOSS, this reads from a backend micro-service which provides responses in JSON.
To build the two images, we will need two new S2I images provided by Red Hat from their registry.access.redhat docker repository
registry.access.redhat.com/redhat-openjdk-18/openjdk18-openshift
and
registry.access.redhat.com/jboss-eap-7/eap71-openshift
yousof@laptop:~$ oc login -u developer -p developer
Login successful.

You have one project on this server: "myproject"

Using project "myproject".

yousof@laptop:~$ oc -n myproject import-image registry.access.redhat.com/redhat-openjdk-18/openjdk18-openshift --confirm
The import completed successfully.

<You should see details of the import here>


yousof@laptop:~$ oc -n myproject import-image registry.access.redhat.com/jboss-eap-7/eap71-openshift --confirm
The import completed successfully.

<You should see details of the import here>
...
So all that has happened above is that you have logged in and imported two new s2i image. In order to use it in the UI of Openshift (a more pleasant experience if you’re not administrating the instance!) you’ll have to properly tag the image streams:
yousof@laptop:~$ oc -n myproject edit is eap71-openshift
...
 17 spec:
 18   lookupPolicy:
 19     local: false
 20   tags:
 21   - annotations: null
 22     from:
 23       kind: DockerImage
 24       name: registry.access.redhat.com/jboss-eap-7/eap71-openshift
 25     generation: 1
 26     importPolicy: {}
 27     name: latest
 28     referencePolicy:
 29       type: Source
...
Change to:
 17 spec:
 18   lookupPolicy:
 19     local: false
 20   tags:
 21   - annotations:
 22       description: Red Hats JBOSS builder image!
 23       tags: builder,java
...
Do the same for the openjdk18-openshift image stream also.
Now you can fire up the UI and take a look at what we’ve done!
Go to your Openshift Console which should be hosted on https://127.0.0.1:8443
Login using the same credentials (user: developer, password: developer)
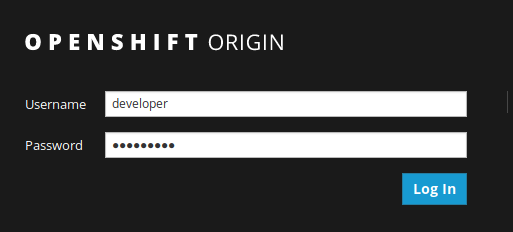
Navigate to your project

Click add to project to add a new deployment to the project:

Select Java:

Select the image we just added (present here because of the added annotations):
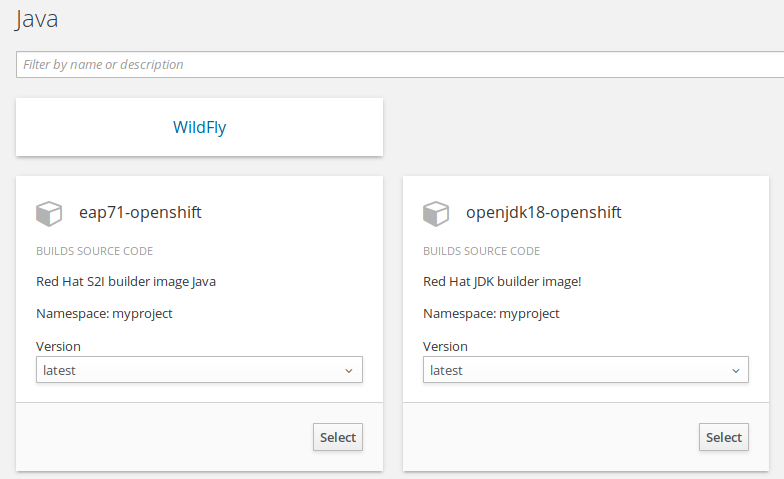
Select the eap S2I image because we’ll build the front-end first!
We will be using the project I have ready here:
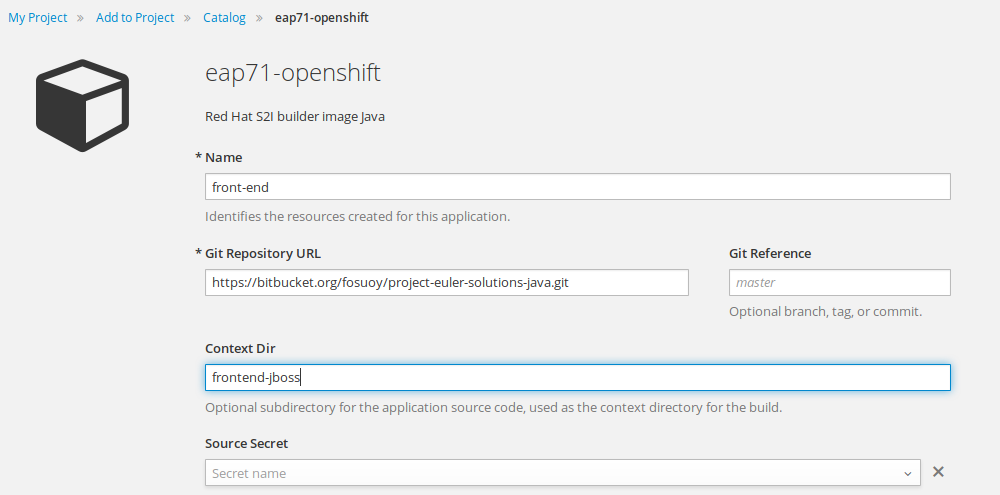
Fill out the form as in the image above, with a context-dir of frontend-jboss.
The context-dir is the directory where the project actually exists.
Scroll down and hit create.
I can give you a break here to explore the interface. It will take some time while Openshift downloads the image, checks out the code compiles and pushes the new image to it’s internal registry.
Personally I’ve found the UI for Openshift to be a bit nicer than Kubernetes but functionally they are very similar - you can follow along the build container log followed by the deployed container and see the standard Springboot start up logs.
Finally you can checkout Applications -> Routes to see the running application. In my case:
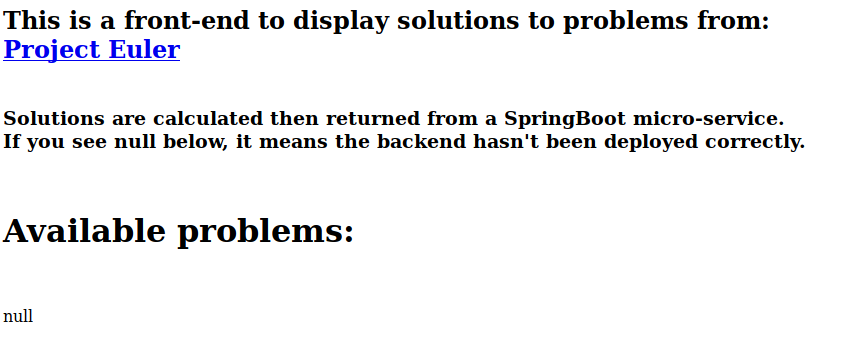
You can see parts of the application are missing because of the backend being missing!
To deploy the backend, go back to ‘add to project’ and select the JDK image this time.
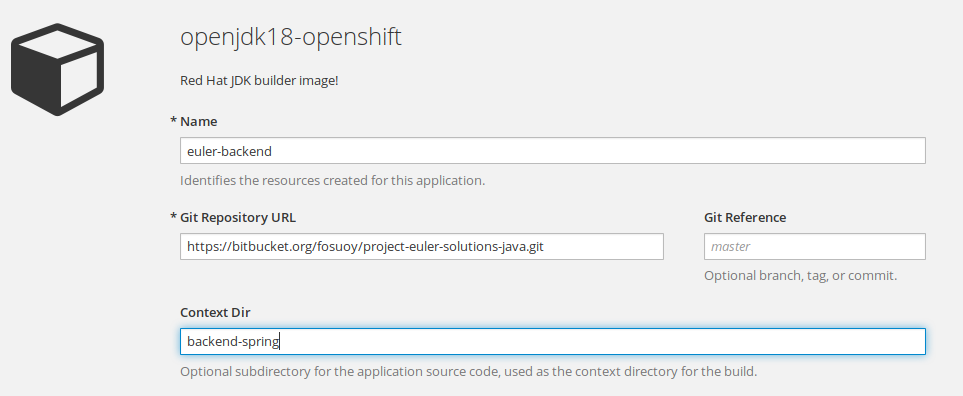
Fill out the form as in the image above, with a context-dir of backend-spring.
IMPORTANT: Make sure to call this backend ‘euler-backend’. Reason being for the frontend to see the backend, the application is looking for a service called euler-backend. Kubernetes handles the DNS / routing of applications deployed on it’s platform and so will do all the appropriate networking / routing automatically in order to find / read the newly deployed service.

Deselect ‘create route’, this means a public URL will not be exposed to the service.
After creating / deploying the new service and waiting for it to reach a serving state, if you go back to the deployed URL - you should now be able to see problems which have solutions provided by the Spring micro-service:
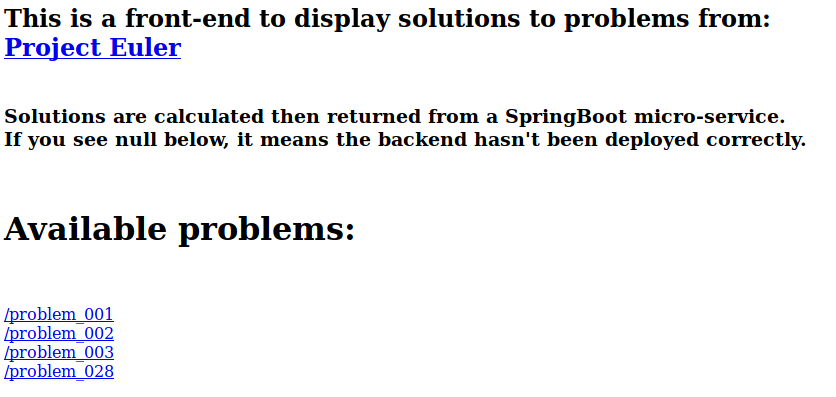
If you change your mind after deploying, and want to see what the micro-service is providing yourself, you can add a route by running the following:
yousof@laptop:~$ oc get svc
NAME            CLUSTER-IP      EXTERNAL-IP   PORT(S)                      AGE
euler-backend   172.30.32.106   <none>        8080/TCP,8443/TCP,8778/TCP   1m
front-end       172.30.181.9    <none>        8080/TCP,8443/TCP,8778/TCP   11m
yousof@laptop:~$ oc expose svc/euler-backend
route "euler-backend" exposed
yousof@laptop:~$ oc get route
NAME            HOST/PORT                                  PATH      SERVICES        PORT       TERMINATION   WILDCARD
euler-backend   euler-backend-myproject.127.0.0.1.nip.io             euler-backend   8080-tcp                 None
front-end       front-end-myproject.127.0.0.1.nip.io                 front-end       8080-tcp                 None
If you curl the euler-backend route, you will see what the JBOSS service is able to see:
yousof@laptop:~$ curl euler-backend-myproject.127.0.0.1.nip.io
{
  "current_problems" : [ "/problem_001", "/problem_002", "/problem_003", "/problem_028" ]
}

yousof@laptop:~$ curl euler-backend-myproject.127.0.0.1.nip.io/problem_001 | jq '.'
{
  "answer": "233168",
  "blurb": "If we list all the natural numbers below 10 that are multiples of 3 or 5, we get 3, 5, 6 and 9. The sum of these multiples is 23.<br> Find the sum of all the multiples of 3 or 5 below 1000.<br>",
  "url": "https://projecteuler.net/problem=1"
}
Where above you can see the use of one of my favourite tools jq.
A lot has been covered here and I hope to expand on some of it in future - that is cool things you can do with jq, or using gradle / springboot to quickly create JSON based APIs as well as loadbalancing / splitting of routes within Openshift.
All good topics to follow up on in future!